

Why do we need docker container?
Did you ever listened of a problem from your teammates that the code you have shared is not working but it was perfectly alright when you used it, ok ,let’s understand this with a practical scenario , assume you are a developer in your organization ,you have developed a new feature and it’s perfectly working for you and you forwarded it to testing team for testing , then you get a reply from them that the newly added feature is not at all working for them, what went wrong here ? , may be the testing team do not have the dependencies required or even though they installed all the required dependencies but a different version or you are working on latest version of OS and they are using older versions, to overcome these kind of problems we have got a solution called containerization. A Container packages up code and all the required dependencies so that the application runs without any error from one computing environment to another, then what is Docker?
Docker is an open source and free containerization platform, It allows full stack developers to package applications into executable components by combining application source code with the operating system libraries and dependencies required to execute that code in any environment, developers can also create containers without using docker, but docker makes it easier to build, deploy cicd pipeline and manage containers using simple commands, you can create a docker container using a docker image, docker images act as a set of instructions or a template to build a Docker container, you can compare a docker image to a snapshot in virtual machine environments, where you can take a snapshot of VM and create similar ones. you can share these images with your team or publicly by uploading them to a container registry there are many container registries in this blog we will look into AWS Elastic Container Registry
Elastic Container Registry
ECR is fully managed docker container registry provided by AWS for hosting docker images , so you need not to worry about hosting your own private container registry , AWS will take care of underline infrastructure like scalability and high availability , and where ever you are going to deploy your docker container like Kubernetes or amazon EKS those container orchestration platform can pull the image from amazon ECS, follow below procedure to create a repository in AWS and upload an Image to it.
In this blog we will create a docker image in an AWS ec2 instance and upload it to Amazon Elastic Container Registry, if you are using your local machine skip step-3 from the whole process and if want to create an AWS ec2 instance refer this blog
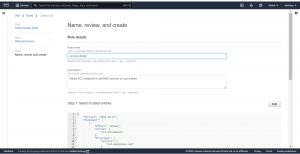
Step-1: Create ECR cluster
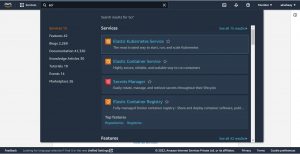
Login to your aws cloud console search for ECR and click on it.
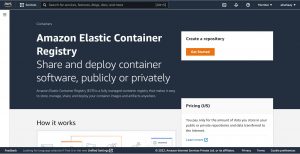
Click on “Get Started” under Create a repository
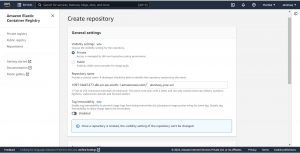
Select ‘Public’ or ‘Private’ under Visibility settings, if you select public your repository will be accessible by everyone to pull the stored images and for private you can give access using IAM roles, for the purpose of this blog I am creating a private repository, give a name to your container repository.
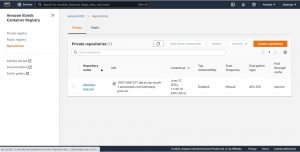
Click on the name or ECR you have created
then click on view push commands, it will show you the commands to login in to ECR, create a docker image and how to tag it and push it to your container repository.

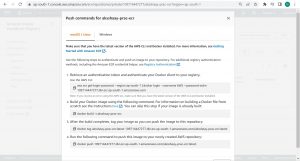
Now let’s see how to Create a Docker image and push it to ECR
Step-2: Writing a Dockerfile
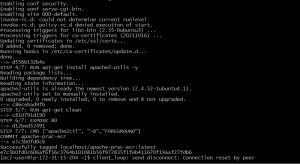
before writing a Dockerfile let’s install docker first, use below command to install docker on your compute instance.
yum install docker -y
Check the installation using below given command.
docker --version
This command gives installed version of docker.

Create a file named Docker in the root folder of the application, every time you create a new docker file create it in new directory and the file name should be starting with capital “D”, use below command to create Dockerfile where vi is an editor and copy the following syntax into the file and save it.
vi Dockerfile
Dockerfile
#Installing apache server on ubuntu
FROM ubuntu
RUN apt-get update
RUN apt-get install apache2 -y
RUN apt-get install apache2-utils -y
RUN apt-get clean
EXPOSE 80
CMD ["apache2ctl", "-D","FOREGROUND"]
each line in Dockerfile is executed as individual step and creates a layer in the Docker image, let’s understand it by breaking down above given docker file which install apache on ubuntu.
Line-1: #Installing apache server on ubuntu
Start a line with “#” to write comments in a Dockerfile.
Line-2: FROM ubuntu
Most of the time you will not create a docker image from scratch, you may use a docker image as a base to build your required image. The FROM keyword tells Docker which base image to use to build the new image, you can only have comments above FROM line but no other commands, In the above given Dockerfile , Docker uses ubuntu image as a base and will perform rest of the things on it.
Line-3: RUN apt-get update, RUN is used to give instructions to docker i.e., run a specific Linux command use RUN keyword.
Line-7: EXPOSE 80, this instruction exposes particular port with a specified protocol(tcp/udp) inside a docker Container.
Line-8: CMD [“apache2ctl”, “-D”,”FOREGROUND”], instructions given with CMD will be executed only when a container is created, it has nothing to do with image building and you can always override these CMD instruction’s using external commands, in our case we are using it to run apache in background.
Step-3: Allow EC2 instance to access ECR using IAM Role
To push your Docker image to ECR you have to connect to it, one of the ways to connect is using IAM role if you are using an AWS ec2 instance, if you are trying to access from your local machine use access key and secret key, as we are using an ec2 instance now let’s go and create a IAM role which allows our ec2 instance to access ECR registry.
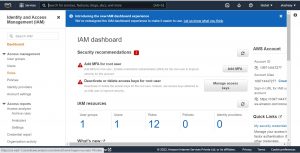
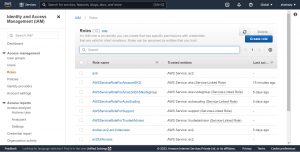
On your AWS console search for IAM and click on it, then on the left pane click on Roles under “Access management”.
Click on ‘create role’
Select “AWS service” for trusted entity and “EC2” for “Use case” as we are creating a role and attaching it our ec2 instance which allows it(instance) to access ECR, then click on “Next”.

Search for policy AmazonEC2ContainerRegistryFullAccess , select it and click on “Next”.
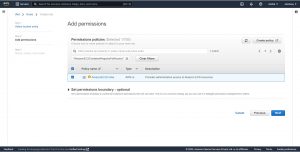
Give a name to your role, scroll down and click on create role.
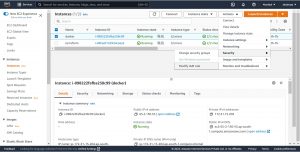
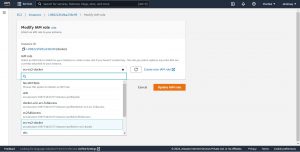
Now assign the Role created to the ec2 instance in which you have docker image, go the ec2 instances select the instance and click on “Actions” and click on “Modify IAM role” under “Security”.
select the role you have created with AmazonEC2ContainerRegistryFullAccess and click on “Update IAM Role”
Now the ec2 instance has full access to Amazon ECR,
Step-4: Authenticate with ECR repository
To push Image to ECR you need to authenticate with it, we will use an AWS CLI command to authenticate with the registry, install AWS cli on your ec2 instance using below commands
curl "https://awscli.amazonaws.com/awscli-exe-linux-x86_64.zip" -o "awscliv2.zip"
sudo yum install unzip -y
unzip awscliv2.zip
sudo ./aws/install
Check your installation by executing below given command
aws --version

Note: if you are using your local machine refer this blog to configure your AWS CLI.
Now go to your Repository and copy its URI.
Use below command to retrieve the authentication details and authenticate with your registry
aws ecr get-login-password --region ap-south-1 | docker login --username AWS --password-stdin 109714447277.dkr.ecr.ap-south-1.amazonaws.com
ap-south-1 is the AWS region where I created my ECR, give your region here.
109714447277.dkr.ecr.ap-south-1.amazonaws.com is my ECR URI, exclude ECR name from the end of ECR URI, give your URI here.

Step-5: Build Docker Image and Push it to ECR
Go to the directory where your Docker file is located, use the command given below to build a docker image
docker build -t apache-prac-ecr .
apache-prac-ecr is the name of image and “.” indicates that Docker file is in same path.
Tag your image after the build is completed successfully.
docker tag apache-prac-ecr:latest 109714447277.dkr.ecr.ap-south-1.amazonaws.com/aksshaay-prac-ecr:latest
By giving a tag for your Docker image it will be easy to pull and run images, in the above command latest is the tag.
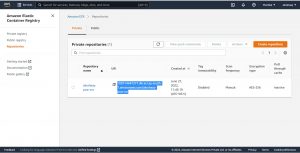
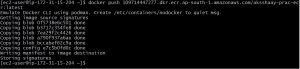
Finally push the Docker image to the repository, use command docker push along with ECR URI and repo name as shown below.
docker push 109714447277.dkr.ecr.ap-south-1.amazonaws.com/aksshaay-prac-ecr:latest
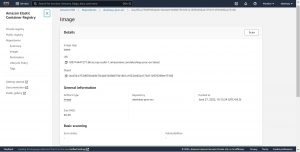
below is the (snapshot from my AWS web console) details of uploaded image to my repository.
Author Information
This blog is written by Checkmate DevOps team, you can connect with our Technical consultant to hire experienced DevOps engineer to manage entire Infrastructure technical stack.
