

The Web Application Firewall(WAF) is a service by Amazon AWS cloud that allows you to monitor HTTP and HTTPS requests delivered to an Amazon CloudFront distribution, an Amazon API Gateway REST API, or an Application Load Balancer.
AWS WAF allows you to select one of the following behaviours at the most basic level:
- Allow every request except the ones you specify.
- Block every request other than the ones you specify.
- Count the number of requests that meet your criteria.
- Check requests that meet your criteria against CAPTCHA entries.
Terminologies related to AWS Web Application Firewall:
Web ACLs: The web access control list protects a set of AWS resources by defining and adding rules. You specify a default action for the web ACL, indicating whether requests that pass the rules inspections should be blocked or allowed through.
Rules: Rules describe the criteria for checking web requests and how requests that meet the criteria should be handled. You can set up rules to prohibit matching requests, allow them to through, count them, or subject them to CAPTCHA checks.
Rules groups: Rules can be used singly or as part of reusable rule groups. Managed rule groups are available via AWS Managed Rules and AWS Marketplace merchants. You can create your own rule groups as well.
How to set up AWS Cloud WAF:
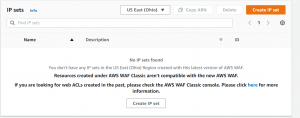
- Login to your AWS cloud account and then go to the WAF dashboard.
- Click on IP sets on the left side.
- After that click on create IP set.
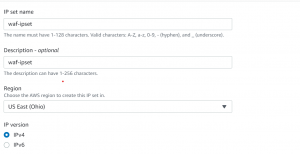
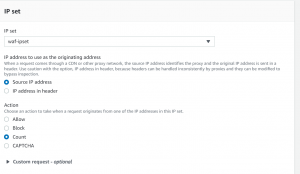
- Select the region and then enter the IP address set for which you want to allow, block or count the received requests.
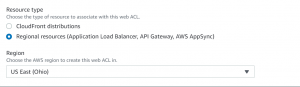
- Now click on Create web ACL.

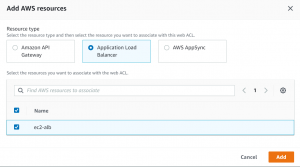
- Here we will be adding Application Load Balancer as a resource type.
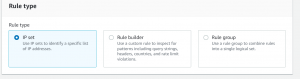
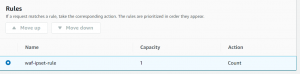
- Add IP set as rule type and select the IP set that we created. We will be using count action for counting the HTTP request from our IP set.
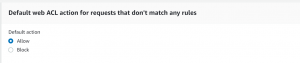
- Next select default action for requests that don’t match any rule. We will be using allow here.
- Next, we have to select rule priority. Since we have only one rule we can click next.
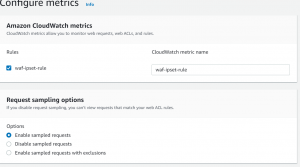
- Next, configure CloudWatch metric name and enable sampling requests.
- Click on Next and Create web ACL.
- After a few minutes, you will start seeing the chart showing the request count.
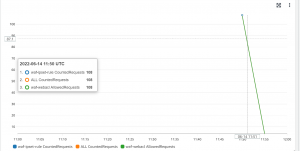
- You can also see charts in CloudWatch. Click on View in Amazon CloudWatch.
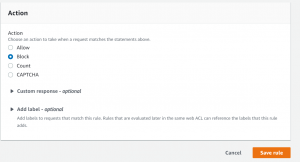
- Now instead of count action, we will block requests from our IP set. For that go to Web ACL-> Rules->Edit.
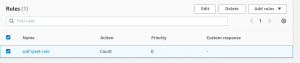
- Change count action to block and click Save.
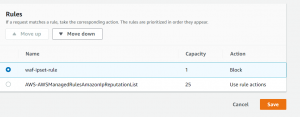
- Now click on Add rule and select Add managed rule groups.
- Add Amazon IP reputation list rule group to web ACL, scroll down click on Add rule.
- Now we will get a 403 Forbidden error if we try to access our application with blocked IP.
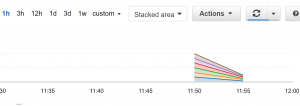
- Now we can see blocked requests from our IP set.

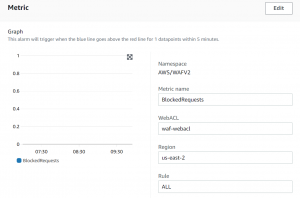
- To set an alarm, go to CloudWatch console->Graphed Metrics.
- We will be setting an alarm for blocked requests. Click on the alarm icon.


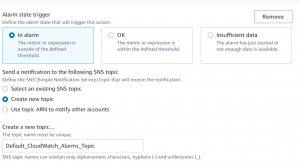
- Enter email, give name and description and click on create alarm.
Author Information
This blog is written by M/S Checkmate Global Technologies cloud engineering team. Connect with them to discuss cloud daily operations management and cloud automation strategies. We can help you hire cloud engineer in just 24 hours.
