

What is a branching strategy?
Branching is a process of duplicating source code stored in version control or SCM, branches allow you to develop your software features parallelly, when you or your team members creates a branch from master/main branch you can work on all the files or data of master branch from the child branch, this allows you to isolate your changes from the master branch. if your work/experimentation goes well you can merge your changes, if your wok fails you can discard the branch.
Git Flow:
Git Flow is a branching strategy considered to be complex process of all available branching strategies, developers can work on new features by creating feature branch and once changes are done these features can be merged with master branch to deploy. git flow has main, develop, feature, release and hotfix branches and the process happen as following.

Master/Main branch is where the code should be in a deployable stage and will be created when a repository is created, Develop branch is branched from main /master all the developers will have this branch in common and and every developer can create a Feature branch from develop branch there can be any number of feature branches, you keep adding commits to feature branch and when you think feature is complete you will raise PR where your team will review your code and merge it back to develop branch once develop has enough features any type of testing or quality analysis can be done at this point, once approved feature branch is merged to Release branch, release branches are created with a version tag like 1.0,2.0 after verification and testing release branch will be merged to master for deployment and develop branch to make the latest release version available for developers to work on.
Hotfix branch: in a software you may have a critical issue sometimes which needs to fix instantly and cannot go through all the above-mentioned flow, so a hot fix branch is created from main branch and work will be done on the bug/issue reported once the problem is fixed then the hotfix branch is merged with main branch for release and to develop branch for developers to work on.
GitHub Flow:
GitHub Flow is a simpler and faster alternative to Gitfow this model doesn’t have release branches, you start with the main branch, to isolate their work developers create branches directly from the master and once this individual branch that a developer is working on comes to a deployable state a PR(Pull request) is created by developer, the updated code is reviewed and merged back into main for deployment with version tags.
The main idea behind this model is keeping the master code in a constant deployable state and to support continuous integration and continuous delivery processes, by deploying a small pieces to production constantly you can eliminate a lot of chances for errors and in case of a failure recovery is fast as you just need to roll back to previous version.
Steps and Git Commands for following a GitHub Flow
Step-1: Add collaborators to your remote repository.
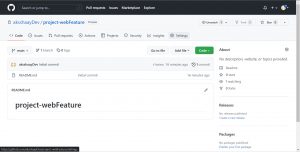
To follow any branching strategy, you have to allow your teammates to work on the project repository by adding collaborators, below is the process for adding collaborators in GitHub, on your remote repository click on settings
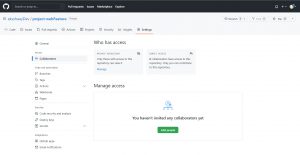
Now click on collaborators under access then under manage access add users that you want to collaborate with
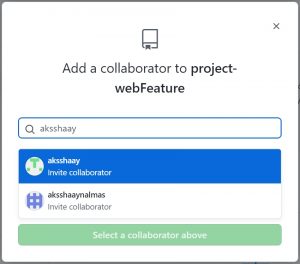
here search for the git hub user for whom you want to give permission on you repo and add them to your repository
Step-2: Share your repository with your team
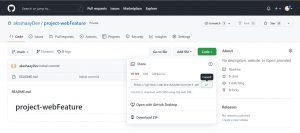
share your repository link with your team so that they can clone your repo and start working on it, on your remote repository got to code to get your project repository link.
Step-3: Creating a branch in local repository and pushing it to remote repository
Now let’s go through some of the git commands that you need to know to follow GitHub flow.
To clone a repository, use command “git clone” with the url of the repo.
git clone https://github.com/aksshaayDev/project-webFeature.git

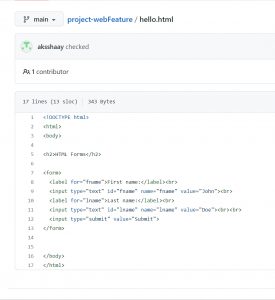
Here I cloned “project-webFeature ” repository to my computer and it has a html file named hello.html with content as shown below.
Git commands to create and check branches in your local repo.
git branch
git branch branch2
“Git branch” gives you all the available branches on your local repository, you can also create a new branch with same command by giving a name along with the command, “branch2” is the name of branch I gave.
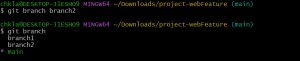
Git command for switching to a newly created branch on your local repo.
git checkout <branch-name>
git checkout branch2
“git checkout” is the command and “branch2” is is name of a branch

then you can work on your code without affecting main branch, and to commit your changes/updates use below commands.
Git commands to commit changes
git add <file name>
git add .
git status
git commit -m 'updates to hello.html'
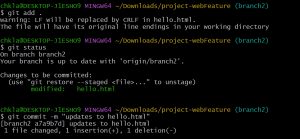
git add will add files to staging or indexing area, staging area is where git stores the changes you can add and remove changes from the staging area, give a file name to add a particular file to staging area or you can use (.) to add all the files in that directory to staging area.
git status is used to display the state of staging area and state between “git add’ and “git commit” commands.
git commit Git considers each commit as a check point you can go back to this point if want to make any changes or if you find any bug use option “-m” to add a message every time you commit it will help you to find out what was changed from previous commit.
Git command to push locally created branch to remote repository
To push your local branch to remote repository, use the following command
git push -u origin branch2
To understand above command lets break down it, git push will transfer commits from local repo to remote repository and git push origin pushes the branches to main branch and the flag -u creates a reference to track your branches that you push onto your remote repository.
when you make changes in master/main branch and push them, changes will directly reflect but when you push a branch you have to raise a PR (Pull Request) where a discussion can be happened on the bugs/features and any one with push privileges can merge it with main, see below for the process to raise a PR.
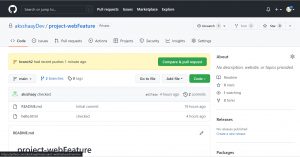
Step-4: Create Pull Request
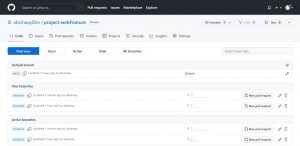
pull request is an event in Git where a contributor of repository asks owner of git repository to review code they have pushed and merge it into main/master branch, follow the process to raise a PR, on your remote repo click on branches beside main
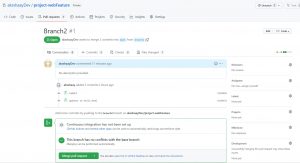
and click on “New pull request” of the branch that you are working on
here you can write your comments and click on “create pull request”

and any one with merge privileges can review your changes and merge them to main branch, check below process to merge a PR.
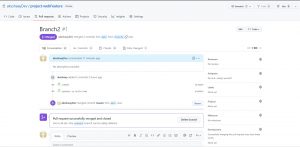
Step-5: Merging a Pull Request
on remote repo go to Pull requests, here you can check the details and merge pull requests.
Author Note
This blog is written by M/S Checkmate Global Technologies engineering team, You can please connect with engineering team to hire experienced DevOps engineer on part-time/full-time/Project basis. Our Technical Consultant are ready to share vetted engineer profile instantly.
