

Amazon Redshift cluster is a fully managed, AWS cloud-based petabyte-scale data warehousing service. Using it you can scale up from a few hundred gigabytes of data to a petabyte or more.
The nodes, or computer resources, that make up an Amazon Redshift data warehouse are clustered together to form a cluster. Each cluster contains one or more databases and is powered by the Amazon Redshift engine.
A leader node and one or more computing nodes are present in each cluster. Client applications send queries to the leader node, which parses them and generates execution plans for the queries. The leader node then coordinates the parallel execution of these plans with the compute nodes and combines the nodes’ intermediate results. Finally, the findings are returned to the client apps.
Steps to create a cluster:
- Login to your AWS cloud account and then go to the amazon redshift dashboard.
- Scroll down and click on create cluster.
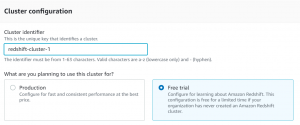
- After that select cluster type according to the use-case. We will be creating a free-tier cluster.
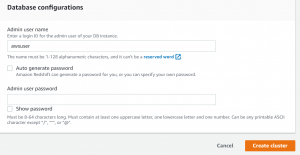
- Configure the database admin username and password and then click on create cluster.
- After the cluster is created go to properties->Associated IAM Roles.
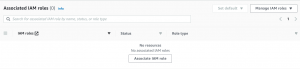
- Click on Associate IAM roles.
- Select AWS Service Role for Redshift.
Loading data in the cluster from the s3 bucket:
- To upload data from s3 to redshift we need to assign an IAM role to redshift.
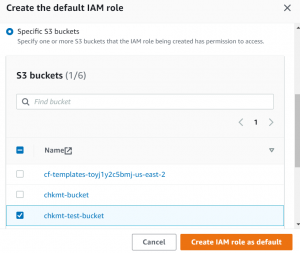
- First, Click on Manage IAM roles-> Create IAM role.

- Select your bucket name and then click on create IAM role as default.
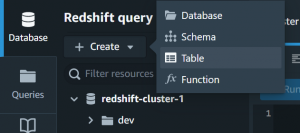
- Click on Query data and then select editor v2.

- Select your cluster and connect to the database.

- Now create a table for your data.
- After that Click on Create.
- Write table name and create columns.
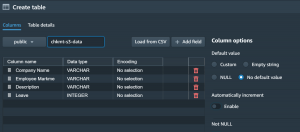
- Click on Create table.
- Now click on Load Data.
- Select your data file from the s3 bucket using browse s3, the IAM role that we created for accessing s3, and the target table that we just created, and then click on Load Data.
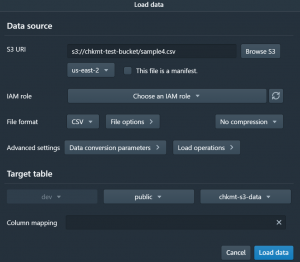
- Now click on run.
- You can now perform queries on your data.
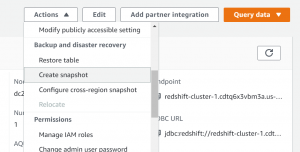
Steps to create a manual snapshot of the cluster:
- From the console, go to actions and then select create snapshot.
- Select a unique identifier for the snapshot as well as the retention period.
- After that click on Create Snapshot.
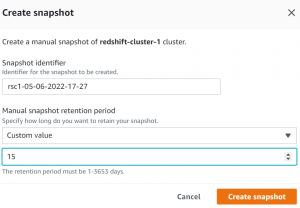
- After 15 days snapshot will be deleted automatically.
Please contact our DevOps consultants to know more DevOps pipeline automation and monitoring services. Connect him to hire Remote DevOps Engineer for project basis.
