

Amazon Web Services offers many options to host a website, as a static website does not need any server-side processing hosting a static website using s3 is simplest, affordable and recommended way.
In this blog we will see how to configure a AWS S3 bucket (Simple Storage service) to host a static website and use AWS Route53 service to make your website accessible using your domain name.
Creating s3 bucket and configuring it to host a static website
Step-1: creating s3 bucket
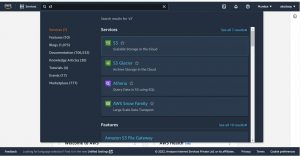
Login to your aws console enter “simple storage service” in search bar and click on s3
Click on create bucket on the top right.
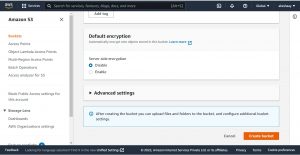
Enter a unique name for your bucket with no spaces and uppercase letters, if have a domain name use the same for your bucket name and scroll down to “Block Public Access settings for this bucket”

As you are going to use your s3 bucket to host a static website, objects of the bucket should be publicly accessible, uncheck “block all public access” and acknowledge it below, this allows to make bucket objects public.

Now scroll down and click on “create bucket” button.
Step-2: Adding bucket policy to make bucket objects public
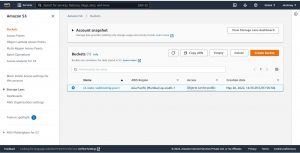
Click on the bucket name you have created
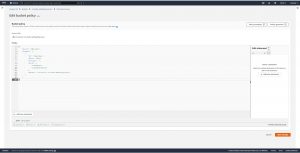
go to permissions scroll down to “Bucket policy” and click on edit, remove the already existing content, and paste the below given policy to make your bucket objects public, this policy grants “s3:GetObject” permission to any public anonymous users. This permission allows anyone to read the object data, which will be useful when you use S3 bucket to host your website.
{
      "Version": "2012-10-17",
      "Statement": [
        {
          "Sid": "PublicRead",
          "Effect": "Allow",
          "Principal": "*",
          "Action": [
                      "s3:GetObject",
                      "s3:GetObjectVersion"
                    ]
         }
    ]
}
Scroll down and click on “save changes” button in the bottom right.
Step-3:uploading files to s3 bucket
In next steps basic html files named “index.html” and “error.html” are uploaded into the bucket, you can upload your website files or create html files using below syntax.
index.html
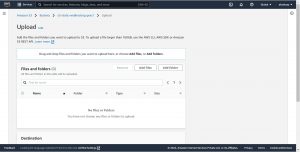
Now go to objects and click on upload button .
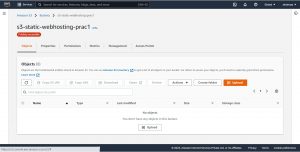
Click on add files select the files to be uploaded scroll down and click on upload button.
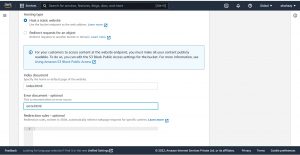
Step-4: Enabling static website hosting on s3 bucket
click close and go to properties, scroll down to “Static website hosting” click on “edit” button. enable static website hosting.
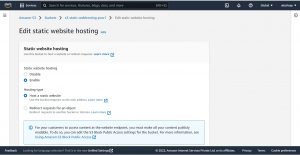
select “Host a static website” scroll down to “Index document” and enter your home page file name of your website from the uploaded files and also give your error page file name, then scroll down and click on “save changes” to save the settings.
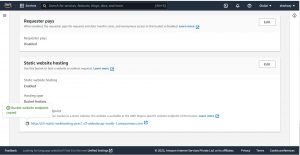
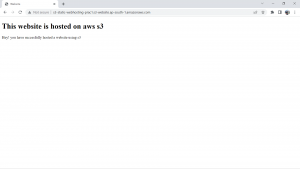
Now go to “static website hosting” in properties copy the link under “Bucket website endpoint” and paste it in your browser.
Here you go, you just hosted a website using aws s3 bucket.
we have hosted a website using s3 ,now to make it accessible using your domain name use “Route53” and make a link between your website end point(s3 endpoint) and domain name.
Associate s3 endpoint with your domain name
Route53 is a Domain Name Server provided by amazon web services, it is integrated with many amazon web services like S3,ec2,cloudfront, this can be used to route a custom domain to any aws service like S3 endpoint, elastic load balancer, you can also register your domain with route53.
Follow process mentioned below to associate s3 endpoint with your domain name.
- In your aws console go to service “Route53” which is under “Network and Content delivery”
- Click on “create hosted zone” under DNS management.
- Enter your domain name, select “Public hosted zone” for type and create hosted zone.
- Once created you will be redirected to records page of your hosted zone / click on your newly created hosted zone name.
- Click on create records select “alias” and select option “Alias to s3 website end point” under “Route traffic to” give your S3 bucket end point here and create the record.
That’s it you can access your website hosted on s3 using your domain name.
Get in touch with us for cloud infrastructure management. Please let us know if you would like to hire fully managed AWS cloud engineer. Our Technical team help you hire cloud engineer in 1-3 working days.
