

Application Deployment: Traditional vs Blue-Green pipeline
When delivering an application traditionally, a failed deployment is usually fixed by redeploying an older, stable version of the application. Due to the expense and time involved in provisioning additional resources, redeployment in traditional data centers often uses the same set of resources. This strategy works, but it has a lot of drawbacks. Rollbacks are difficult to implement since they necessitate starting from scratch with a previous version. Since this process takes time, the application can be inaccessible for extended periods of time. Even though the application is simply compromised, a rollback is necessary to replace the flawed version. As a result, you are unable to troubleshoot the existing problematic program.
Blue-Green Deployment is an application release methodology in which you create two separate but identical environments. The traffic from the current version (blue environment) of an application or microservice is transferred to a newer version(green environment), both of which are already in production. After the green environment has undergone testing, the blue environment is deprecated, and actual application traffic is switched to the green environment.
The blue-green deployment methodology increases application availability and lowers deployment risk by simplifying the rollback process if a deployment fails.
Advantages of Blue-Green Deployment
It is challenging to validate your new application version in a production deployment while also continuing to use the older version of the program when using a traditional deployment with in-place upgrades. Your blue and green application environments will be somewhat isolated thanks to blue/green deployments. This makes sure that creating a parallel green environment won’t have an impact on the resources supporting your blue environment. The danger of deployment is decreased by this separation.
You have the chance to validate the green environment after deployment. To better mimic genuine user traffic, you may do this using test traffic before sending production traffic to the green environment, or by utilizing a very modest amount of production traffic.
Steps to set up Blue-Green Deployment in AWS Cloud
Prerequisites:
- Docker image stored in the elastic container registry. We will be using a docker image of a web application running on Nginx.
- A GitHub repository with Dockerfile in it.
- An IAM role for CodeDeploy to manage ECS. Attach AWSCodeDeployRoleFSeorECS policy to it.
Step1: Create an AWS ECS cluster
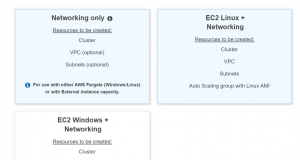
- Go to the ECS dashboard and then click Create cluster.
- We will use AWS Fargate for creating the cluster so select Networking only cluster template.
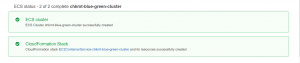
- Give name and tag, select or create VPC and enable container insights.

- Scroll down and click Create cluster.
Step2: Create Load Balancer and Target groups
- Go to the EC2 console and select Load balancer from the navigation pane on left.
- Click Create Load balancer and then select Application load balancer.
- Give name and make load balancer internet facing.
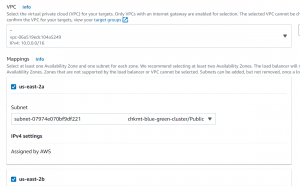
- Select VPC in which the ECS cluster is created. Next, select subnets.
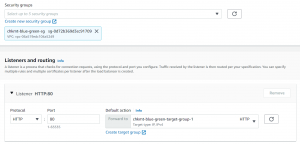
- Click Create Security group. Allow inbound traffic on port 80. Make sure your security group is in the VPC, in which we have created our ECS cluster.
- Next in listeners, click Create target group.
- Select IP addresses as the target type, give a name, and select the VPC.
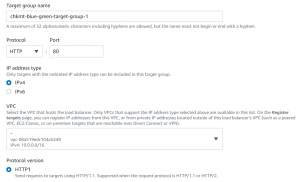
- Click Next->Create Target Group.
- After that add the target group as the listener.
- Next, click create load balancer.
Step3: Create Task definition and service
- Go to the ECS console, select task definition, and then click create new task definition.
- After that select Fargate launch type.
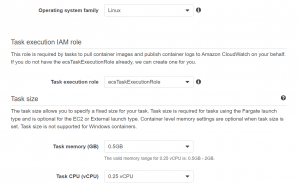
- Give a name and select ecsTaskExecutionRole as the task role and task execution role. If this role is not there, go to the IAM console and create a role with AmazonECSTaskExecutionPolicy attached to it.
- Select Task memory and CPU according to application.
- Next, click Add container.
- Add the container name and image URI. Our container will run on port 80. We want that we can access it from the load balancer by same port. Add port mapping for that.
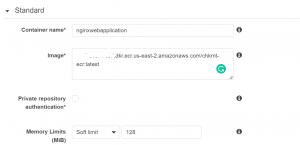

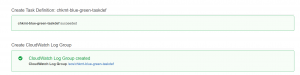
- Add container and then click Create.
- Next, go to cluster->services and click create.

- Select Fargate as the launch type.
- After that select the task definition and service that we created.
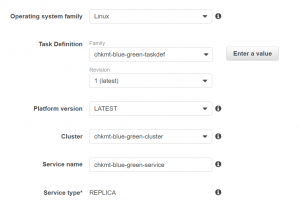
- We will keep the number of tasks as 2.
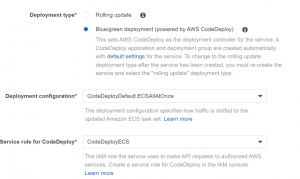
- Select deployment type as blue-green deployment, and then select service role for Codedeploy with the adequate policy attached. We will keep the deployment configuration ECSAllAtOnce.
- Click next, and select VPC, subnets, and security group that we created earlier.

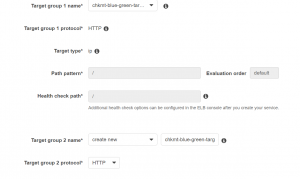
- Select Application load balancer as the balancer type and then add the container to load balancer.
- Select production listener port 80.

- For target group 1, select the target group which we created earlier.
- Create another target group for target group 2.
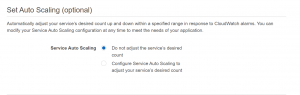
- Click next, select Do not adjust the service’s desired count and click next.
- Review and click Create Service.
- You can now access your application using load balancer dns.

Step4: Create CodeDeploy Pipeline
- Go to the CodeDepoly dashboard.
- Select pipeline from the navigation pane on left and click Create pipeline.
- Give a name and choose the service role.
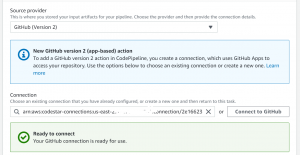
- Select GitHub as a Source provider. Connect to your Github and select the repository and branch.
- Select Output artifact format as CodePipeline default.
- Select AWS CodeBuild as the build provider.
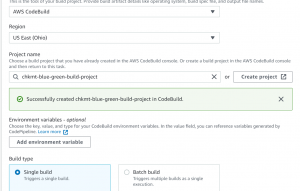
- Click Create Project.
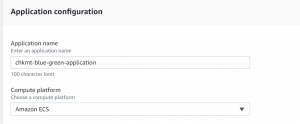
- Give a name to your project.
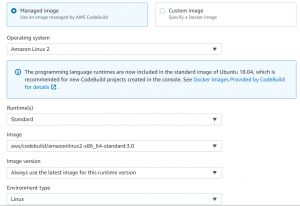
- Select managed image as environment image and Amazon Linux as the operating system.
- Choose a service role.
- For buildspec choose the insert build command and then switch to the editor. Copy the following code to the editor.
version: 0.2
phases:
 pre_build:
   commands:
     - REPOSITORY_URI=YOUR_ECR_URI
     - echo $CODEBUILD_RESOLVED_SOURCE_VERSION
     - COMMIT_HASH=$(echo $CODEBUILD_RESOLVED_SOURCE_VERSION)
     - IMAGE_TAG=${COMMIT_HASH}:latest
     - $(aws ecr get-login --no-include-email --region YOUR_REGION)
 install:
   runtime-versions:
     java: corretto11
 build:
   commands:
     - printf '{"ImageURI":"%s"}' $REPOSITORY_URI:latest > imageDetail.json
     - docker build -t YOUR_ECR_URI:latest .
     - docker push YOUR_ECR_URI:latest
artifacts:
 files:
    - 'image*.json'
    - 'appspec.yaml'
    - 'taskdef.json'
 secondary-artifacts:
    DefinitionArtifact:
      files:
        - appspec.yaml
        - taskdef.json
    ImageArtifact:
      files:
        - imageDetail.json
- Replace YOUR_ECI_URI with the docker image URI stored in ECR. Remove tag from image URI. Replace YOUR_REGION with your AWS region.
- Enable privileged flag to build docker images.
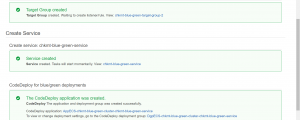
- Click Create and then select the project.
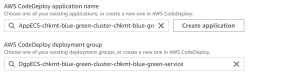
- Select Amazon ECS(Blue/Green) as deploy provider then click Create application.
- Select ECS as compute platform.
- Select the application and deployment group created previously by ECS.
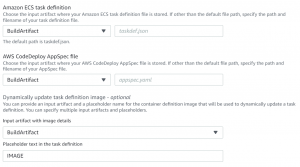
- Select BuildArtifact for task definition and AppSpec file. Select BuildArtifact for input artifact and IMAGE in placeholder text.
- Now create a file name appspec.yaml, paste the following code in it and push it to the root directory of your GitHub repository.
version: 0.0
Resources:
 - TargetService:
     Type: AWS::ECS::Service
     Properties:
       TaskDefinition: "<TASK_DEFINITION>"
       LoadBalancerInfo:
         ContainerName: "YOUR_CONTAINER_NAME"
         ContainerPort: 80
- Replace YOUR_CONTAINER_NAME with the name of your container.
- Create another file with the name taskdef.json. Go to Task definition, open the JSON editor, copy the code and paste it into the taskdef.json file. Find the following properties in the taskdef.json file and replace them with the following values.
"image": "<IMAGE>"
"taskDefinitionArn": "<TASK_DEFINITION>"
- Push the taskdef.json file into the root directory of your GitHub repository.
- Next review and click create.
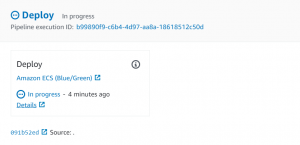
- Our pipeline has now started executing.
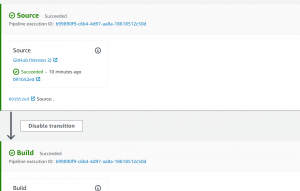
- Click on details in the Deploy stage of the pipeline.
- In some time we will see the traffic is shifted to the replacement cluster.
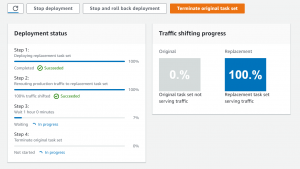
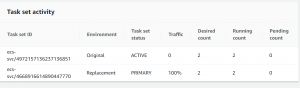
- The original task set will be terminated in 1 hour which is the default time set. It can be changed in deployment settings. To terminate the task set you can click Terminate original task set.
- To stop the updated deployment and go back to the previous version click on Stop and roll back deployment.
- Now, if we push any changes for our application in the GitHub repo, it will automatically trigger the pipeline and set up blue-green deployment.
Please contact our Technical consultants if you have anything to discuss about cloud infrastructure, IT Staff Augmentation Services, Hire Software Developer in India, Technology Architecture, cloud services cost optimisation or DevOps Management Services , and Virtual CTO in India .
