
Microsoft Azure DevOps Stater Kit
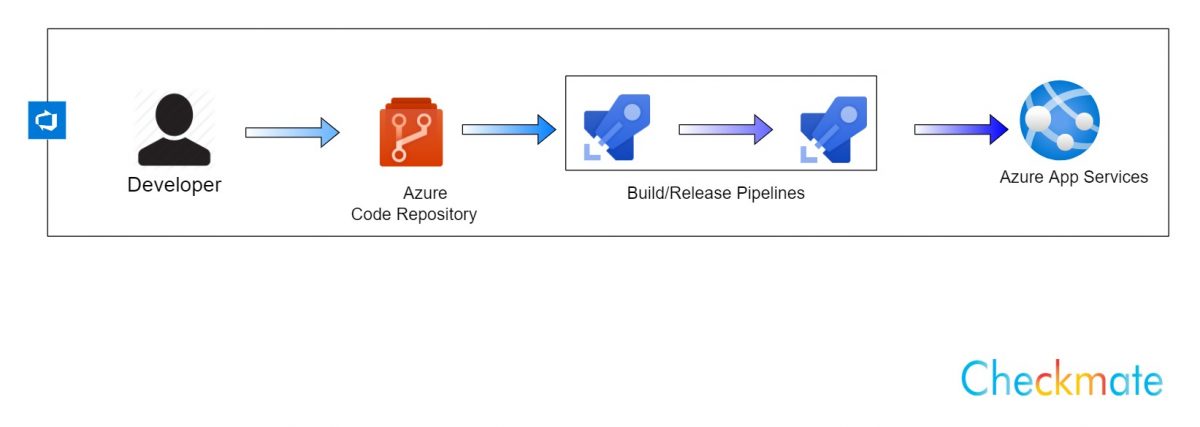
Microsoft Azure provides full-fledged complete package of DevOps Continue integration and deployment pipeline, for creating a devOps CICD pipeline using DevOps stater kit Login on to your azure portal , Click on create resource and select DevOps Starter under DevOps.
We are going to create a project with the DevOps starter which will provision resources in azure like repository, trigger, build pipeline/deploy pipeline and resources that application to be deployed, it’s completely up to you if you want to customize it or not.
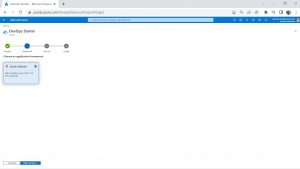
Here we have two options to create a build/release pipeline those are Microsoft azure devops pipeline which uses azure workflow or you can use the GitHub workflow , as shown in the below image I am selecting Azure DevOps in DevOps starter settings and selecting and Static website which will give me a template application and a predefined configuration file for pipeline, either you can start it with by creating a new application or you can also bring your existing application to Azure by selecting bring your own code in the given options.

In the next step select the application framework depending upon your application requirements, and click on next .
In step-3 select the hosting service where you want to deploy your application based on your requirements
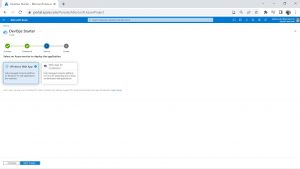
Windows web app
it’s a fully managed cloud computing-based platform for hosting websites, it is a platform as a service which allows publishing Web apps running on multiple frameworks and written in different programming languages, here fully managed implies that you no need to create this resource or worry about its scaling and configuration and
Web app for containers is a fully managed compute platform for deploying containerized applications.
In the last step give names for your project and web app and the location where you want to deploy your application , Click on Additional Settings to change the App Service plan based on which you will get a number of CPU cores and RAM, I am selecting F1 Free which gives me a free 60 CPU minutes per day, 1 GB RAM and 1 GB storage, after giving all the required details click on Review + Create .
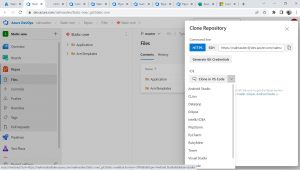
It may take a while to create and deploy the resources, once the resources are created , click on Go to resources, and go to Repositories.

Click on Clone to get the links to clone the repo or to directly clone to your IDE by selecting the IDE that you use, click on generate git credentials to get Username and password of the repo, once the repository is cloned you can start working on your project.
Author Details
This blog is written by Checkmate Global Technologies engineering team, Please reach out to them for any other technical consultation about CICD Pipeline Management, Cloud Engineering and product development.
