
Note: This blog assumes that you already know how to create a VPC using AWS web console and have a clear understand of it’s architecture and requirements, if you are new to Cloud Formation please refer this blog for basic understand of what it is.
What are Parameters, Resources, Outputs in an AWS Cloud Formation template?
Parameters
when you want to allow any user input while creating a stack like name of a s3 bucket or if you want to reuse the same template it’s not recommended to hardcode all the details of your resources rather you can give these details using parameters, let’s see this while creating the stack in aws console, and it’s completely optional to define parameters in a template , below is an example parameter which is intended to be used for a VPC CIDR.
Parameters:
  VpcCIDR:
    Default: 10.0.0.0/16
    Description: Please enter the CIDR (IP range) for this VPC
    Type: String
all the parameters that you declare in a template should be under Parameters: tag only and VpcCIDR: is the logical names it can be any alpha alphanumeric value and it should be unique from all the logical names that were defined with in a template as one can refer to this parameter with this logical name only, different parameter types allowed string , number, list of numbers, comma-delimited list , the type of value allowed for a particular parameter is declared under Type:, and the value given for Default: key word will be used by cloud formation for creating the stack/infrastructure if no other value is given by the user while creating the stack.
Resources
there more than 200 plus resources available in aws , the infrastructure that you want to deploy should be declared under Resources tag in configuration file , and every resource will have its own properties and there will be some required properties for each resource that need to be declared to deploy a resource, below is the basic syntax to declare a resource
Resources:
  VPC:
    Type: AWS::EC2::VPC
    Properties:
      CidrBlock: !Ref VpcCIDR
      EnableDnsHostnames: true
      EnableDnsSupport: true
      InstanceTenancy: default
      Tags:
        - Key: Name
          Value: Test VPC
Here Resources: is tag under which you need to declare resources that you want deploy and Type:AWS::EC2::VPC is the resource key word for VPC . CidrBlock, EnableDnsHostnames, InstanceTenancy are the basic properties that are needed to create a vpc, and as you can see Intrinsic function !Ref is used to get the value for CidrBlock property by referring to VpcCIDR which is declared in Parameters part.
Intrinsic functions are basically built-in functions that comes within the AWS cloud formation, The intrinsic function Ref returns the value of the given parameter or resource, when you specify a parameter’s logical name, it returns the value of the parameter and if you specify a resource’s logical name, it returns a value that you can use to refer to that resource.
Outputs
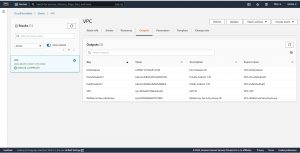
once the stack is created or the infrastructure is deployed to get the details of resources , for example you have deployed a ec2 instance and you want Id of that instance you have to go all the way to ec2 dashboard in AWS web console for this , to make it easier we can declare outputs with in the same template you are using to create your infrastructure , this will give you specific details in the output section of cloud formation, lets see this while creating the stack in CF.
below is the basic syntax to declare a output ,
Outputs:
  Logical ID:
    Description: Information about the value
    Value: Value to return
    Export:
      Name: Name of resource to export
Intrinsic Function in AWS Cloud Formation
Before going on to create whole template to create a VPC Let’s look in to two more intrinsic functions.
!Sub
The intrinsic function Fn: :Sub called as substitute function substitutes variables in an input string with values that you specify, you can use this function to construct commands or outputs in your template, go through the below given yaml configuration and explanation below it.
Resources:
  VPC:
    Type: AWS::EC2::VPC
    Properties:
      CidrBlock: !Ref VpcCIDR
      EnableDnsHostnames: true
      EnableDnsSupport: true
      InstanceTenancy: default
      Tags:
        - Key: Name
          Value: Test VPC
Outputs:
  VPC:
    Description: VPC ID
    Export:
      Name: !Sub ${AWS::StackName}-VPC
    Value: !Ref VPC
In the above cloud formation template, Fn:: Sub is used in the output to give a export name, ${Variable name } this is the syntax to describe a variable using substitute function, !Sub ${AWS::StackName} is used it to get the stack name and giving it as a Export name.
GetAZs
The intrinsic function Fn::GetAZs returns an array that lists Availability Zones in a region in alphabetical order, so that way you don’t have to hard-code a full list of Availability Zones for a specified region.
Select intrinsic function select returns a single object from a list of objects based on given index.
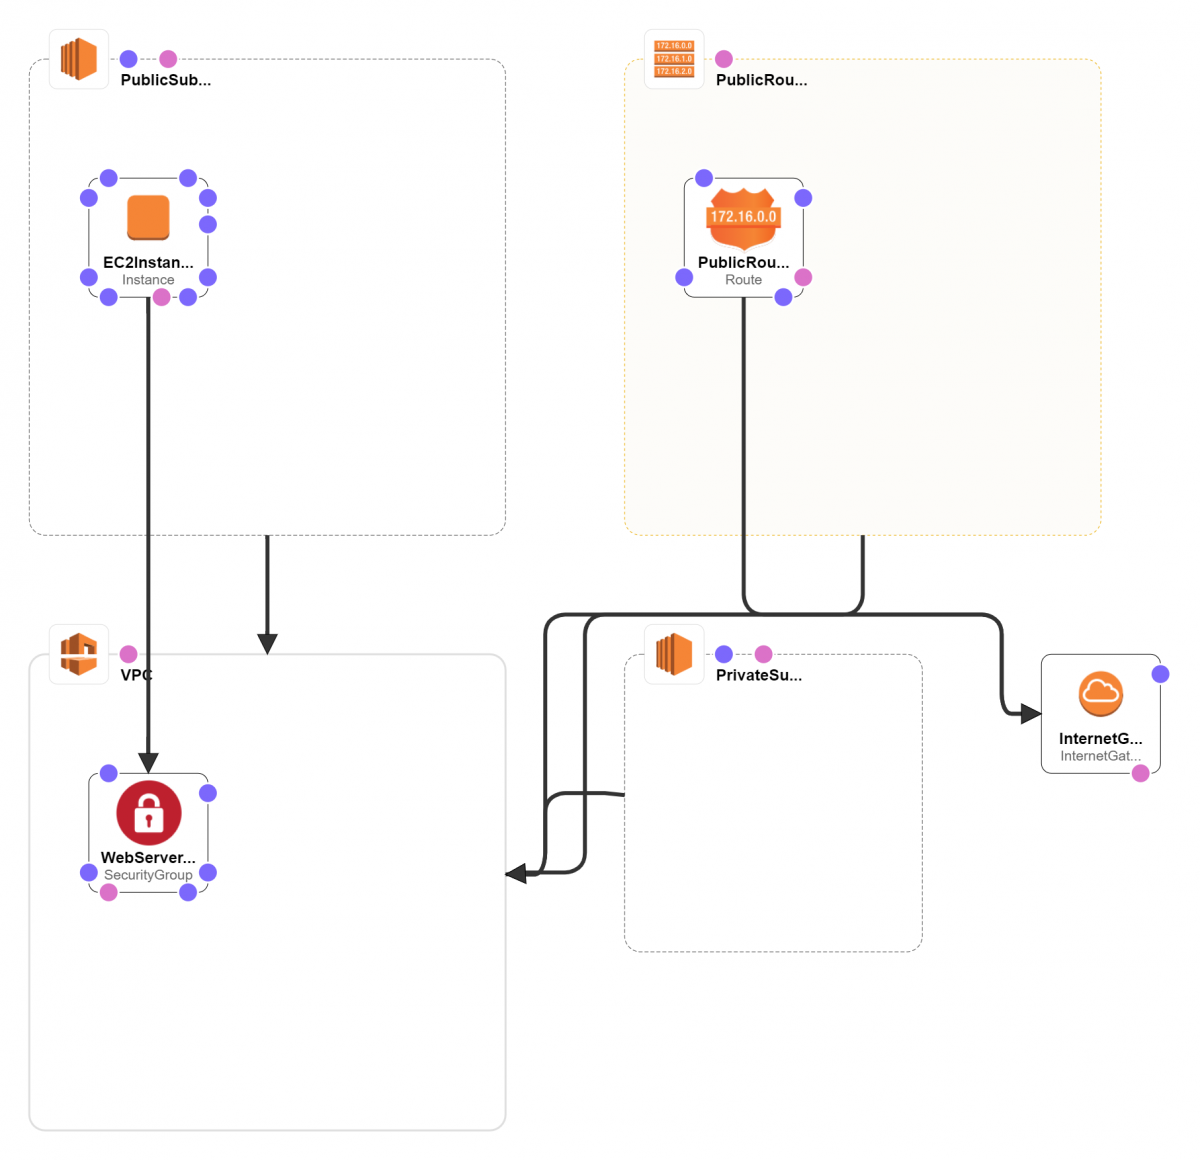
Cloud Formation Template to Create VPC
Below is the complete configuration in yaml for creating a VPC(CIDR: 10.0.0.0/16 ) with one public (CIDR: 10.0.0.0/24) and one private subnet(CIDR: 10.0.1.0/24), go through each block and save in a yaml file.
AWSTemplateFormatVersion: 2010-09-09

Description: This template creates vpc with public and private subnets

# Parameters are used to to build flexible/reusable CloudFormation templates
Parameters:
  VpcCIDR:
    Default: 10.0.0.0/16
    Description: Please enter the IP range (CIDR notation) for this VPC
    Type: String

  PublicSubnet1CIDR:
    Default: 10.0.0.0/24
    Description: Please enter the IP range (CIDR notation) for the public subnet 1
    Type: String

  PrivateSubnet1CIDR:
    Default: 10.0.2.0/24
    Description: Please enter the IP range (CIDR notation) for the private subnet 1
    Type: String

  SSHLocation:
    Default: 0.0.0.0/0
    Description: The IP address range that can be used to access the web server using SSH.
    MaxLength: '18'
    MinLength: '9'
    Type: String

Resources:
# Create VPC
  VPC:
    Type: AWS::EC2::VPC
    Properties:
      CidrBlock: !Ref VpcCIDR
      EnableDnsHostnames: true
      EnableDnsSupport: true
      InstanceTenancy: default
      Tags:
        - Key: Name
          Value: Test VPC

# Create Internet Gateway
  InternetGateway:
    Type: AWS::EC2::InternetGateway
    Properties:
      Tags:
        - Key: Name
          Value: Test IGW

# Attach Internet Gateway to VPC
  InternetGatewayAttachment:
    Type: AWS::EC2::VPCGatewayAttachment
    Properties:
      InternetGatewayId: !Ref InternetGateway
      VpcId: !Ref VPC

# Create Public Subnet1
  PublicSubnet1:
    Type: AWS::EC2::Subnet
    Properties:
      AvailabilityZone: !Select [ 0, !GetAZs '' ]
      CidrBlock: !Ref PublicSubnet1CIDR
      MapPublicIpOnLaunch: true
      Tags:
        - Key: Name
          Value: Public Subnet 1
      VpcId: !Ref VPC

# Create Route Table
  PublicRouteTable:
    Type: AWS::EC2::RouteTable
    Properties:
      Tags:
        - Key: Name
          Value: Public Route Table
      VpcId: !Ref VPC

# Add a Public Route to the Route Table
  PublicRoute:
    Type: AWS::EC2::Route
    Properties:
      DestinationCidrBlock: 0.0.0.0/0
      GatewayId: !Ref InternetGateway
      RouteTableId: !Ref PublicRouteTable

# Associate Public Subnet1 with Public Route Table
  PublicSubnet1RouteTableAssociation:
    Type: AWS::EC2::SubnetRouteTableAssociation
    Properties:
      RouteTableId: !Ref PublicRouteTable
      SubnetId: !Ref PublicSubnet1

# Create Private Subnet1
  PrivateSubnet1:
    Type: AWS::EC2::Subnet
    Properties:
      AvailabilityZone: !Select [ 0, !GetAZs  '' ]
      CidrBlock: !Ref PrivateSubnet1CIDR
      MapPublicIpOnLaunch: false
      Tags:
        - Key: Name
          Value: Private Subnet 1 | App Tier
      VpcId: !Ref VPC

# Create Security Group for the Web Server
  WebServerSecurityGroup:
    Type: 'AWS::EC2::SecurityGroup'
    Properties:
      GroupDescription: Enable traffic on ports 80/http, 443/https, 22/SSH
      SecurityGroupIngress:
        - IpProtocol: tcp
          FromPort: '80'
          ToPort: '80'
          CidrIp: "0.0.0.0/0"
        - IpProtocol: tcp
          FromPort: '443'
          ToPort: '443'
          CidrIp: "0.0.0.0/0"
        - IpProtocol: tcp
          FromPort: '22'
          ToPort: '22'
          CidrIp: "0.0.0.0/0"
      Tags:
        - Key: Name
          Value: WebServer Security Group
      VpcId: !Ref VPC

#Create an EC2 instance in public subnet.
  EC2Instance:
    Type: AWS::EC2::Instance
    Properties:
      InstanceType: t2.micro
      ImageId: "ami-051dfed8f67f095f5"
      KeyName: key9
      NetworkInterfaces:
        - DeviceIndex: 0
          AssociatePublicIpAddress: true
          DeleteOnTermination: true
          SubnetId: !Ref PublicSubnet1
          GroupSet:
            - !Ref WebServerSecurityGroup

Outputs:
# Export VPC ID
  VPC:
    Description: VPC ID
    Export:
      Name: !Sub ${AWS::StackName}-VPC
    Value: !Ref VPC

# Export Public Subnet 1
  PublicSubnet1:
    Description: Public Subnet 1 ID
    Export:
      Name: !Sub ${AWS::StackName}-PublicSubnet1
    Value: !Ref PublicSubnet1

# Export Private Subnet 1
  PrivateSubnet1:
    Description: Private Subnet 1 ID
    Export:
      Name: !Sub ${AWS::StackName}-PrivateSubnet1
    Value: !Ref PrivateSubnet1

# Export WebServer Security Group ID
  WebServerSecurityGroup:
    Description: Webserver Security Group ID
    Export:
      Name: !Sub ${AWS::StackName}-WebServerSecurityGroup
    Value: !Ref WebServerSecurityGroup

# Export DataBase Security Group ID
  EC2Instance:
    Description: EC2 Instance  ID
    Export:
      Name: !Sub ${AWS::StackName}-EC2Instance
    Value: !Ref EC2Instance
Steps to Create Infrastructure using Cloud Formation and Configuration Template
On your AWS web console search for Cloud Formation then click on create stack.
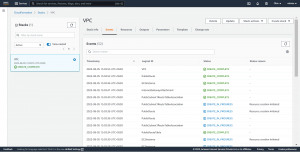
Stack: To create resources defined in template you need to create a stack in cloud formation which allows you to manage your resources like delete update or create.
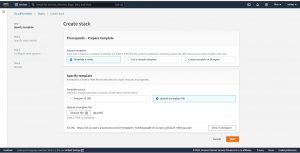
Then in step-2 give a name to your stack and also you change the default values of the parameters that you declared in the configuration template.

In step-3 you can give tags and the IAM role that should be used by CF to create your stack and in Step-4 Review all the details and click on Create Stack , this will redirect you to events page where you can see the progress of the deployment.
Now go to Outputs to see the values that you have exported in the configuration file.
Please contact our cloud consultants if you have any cloud infrastructure related issues to be discussed.
